3
    Third GradePowered by ThirdGrade.com

    Daily lesson plan

    Day 2 · Tuesday

    Week 33 · Synthesis: Area, Shapes, Research, Traits & Civic Action

    See what your state adds or places differently

    Suggested daily schedule
    8:30–8:45 AM15 minMorning Circle / Read-Aloud / Calendar
    8:45–10:00 AM75 minEnglish Language Arts
    10:00–11:00 AM60 minMathematics
    11:00–11:15 AM15 minSnack and Movement Break
    11:15–12:00 PM30–45 minScience (every day)
    12:00–12:45 PM30–45 minSocial Studies (every day)
    12:45–1:30 PM45 minLunch and Choice Time
    1:30–2:15 PM45 minSpecials: PE / Art / Music (rotating)
    2:15–2:45 PM30 minIndependent Reading & Journaling

    Social Studies

    Objective: I can choose a real community issue for my project and explain who it affects.

    Standards: D4.6.3-5, D2.Civ.10.3-5, D4.8.3-5, D1.1.3-5, D1.2.3-5

    Builds on: Needs Day 1 (the six steps) and Week 8 Day 1 (compelling questions). One-minute check: "What is a compelling question?" (A big question worth investigating that people may answer in different ways.)

    New words:
    • issue – a problem that affects many people and that people may see in different ways

    Materials: Civic Action Project planner, Step 2 (or a notebook page titled Step 2), Noticing list and Step 1 ideas from Day 1, 1 sheet of paper (issue-choosing chart), 3 small paper slips (for a family vote if two ideas tie), Notebook, Pencil

    1. Warm-Up · 5 min

      Spaced review from Week 7. Ask: "What is a point of view?" (How one person or group sees and feels about something.) Then ask the big question: "Which problem on your noticing list bothers you the most, and why?"

    2. Mini-Lesson · 10–15 min

      Say: "An issue is a problem that affects many people. A good project issue passes five tests." "Is it real? We saw it ourselves." "Is it local? It is in our town, school or neighborhood." "Is it kid-sized? We can do something in two weeks with an adult." "Does it help others?" "Is it safe?" Say: "Idea 1: end all pollution. It is not local and not kid-sized. It scores 3 out of 5." Say: "Idea 2: litter by the Oak Street bench. It passes all five tests." Say: "People can see one issue differently. A new dog park may please dog owners. Neighbors may worry about barking. Their views come from what they care about. A good citizen listens to both." Say: "Next, turn the issue into a compelling question, such as 'How can we keep our playground clean?' People may answer it in different ways." Ask: "Who else would care about the answer, and why?" (Sample: families who play there.) Ask: "Which tests does 'stop all littering everywhere' fail?" (Local and kid-sized.) Ask: "Why might the neighbors and the dog owners disagree?" (They care about different things: quiet, or a place for dogs to run.) If stuck, say: "Could we work on it this week, near home, with a grown-up?"

    3. Activity / Source Work · 15–20 min

      Choose an issue. 1) On the sheet of paper, draw a chart with seven columns: Idea | Real | Local | Kid-sized | Helps others | Safe | Score. 2) Your child writes the top three ideas from Step 1 in the first column. 3) For each idea, mark one point for every test it passes. Write the score out of 5. 4) Choose the idea with the highest score. If two tie, hold a family vote. Each person gives one reason first, then votes on a paper slip. 5) Your child names two groups the issue affects. 6) Your child names one person or group who might see it differently and tells what they care about. Sample: "The park workers may say they have too few helpers." 7) Ask for evidence: "Show me on the chart why this idea won." Look for an issue that scores 5, such as playground litter or a food bank that needs supplies. If no idea scores 5, shrink one together until it does.

    4. Notebook Entry · 10 min

      On Step 2, your child writes an issue statement. "In our ___, ___ is a problem because ___. It affects ___." Below it, write the compelling question: "How can we ___?" Sample: "In our park, litter by the bench is a problem because it blows into the playground. It affects kids and families."

    5. Exit Ticket · 5 min

      Read the questions aloud. Your child answers aloud, then writes question 1. Praise listening to another point of view.

    Watch for: Picking a problem that is too large, such as "world hunger" or "pollution."

    Try: Shrink it together. Ask: "Where can we help with that near us? This week?" Stop when it is local and doable.

    Exit ticket:
    1. Which issue is kid-sized: hunger around the world, or an empty shelf at the town food bank? Tell why.
    2. Name two groups of people your issue affects.
    3. Name someone who might see your issue differently. What might that person care about?
    Show answers
    1. The empty shelf. It is local, and a child can help in a short time with an adult.
    2. Answers vary. Look for: two real groups, such as children who use the park and families who walk there.
    3. Answers vary. Look for: a real person or group and something they value, such as cost, quiet or safety.

    Support: Offer three ready issues to score: park litter, a book drive, or thank-you notes for community workers. Your child picks one.

    Extend: With an adult, your child interviews one person who might see the issue differently. Write what that person cares about.

    Homework: Your child reads the issue statement to a family member and asks who else it affects. Look for one new group added to the notebook.

    Practice page · Week 33, Day 2

    Social Studies

    I can choose a real community issue and tell who it affects.

    Look: the five tests

    1. Is it real and local? Did we see it in our town?
    2. Is it kid-sized? Can we help in two weeks with an adult?
    3. Does it help others, and is it safe?

    Choose an Issue: give each idea 1 point for every test it passes.

    IdeaRealLocalKid-sizedHelpsSafeScore


    1. 1.

      My top idea and its score:

    2. 2.

      Fix the potholes on the highway yourself. Which tests does it fail?

    3. 3.

      Two groups my issue affects:

    People can see an issue in different ways.

    1. 4.

      A town plans a new skate park. Who might be glad?

    2. 5.

      Who might worry, and why?

    3. 6.

      Write your issue: In our ____, ____ is a problem because ____. My compelling question: How can we ____?

    Challenge: Why should a good citizen listen to people who see an issue differently?
    Mathematics

    Objective: I can count the sides and vertices of polygons.

    Standards: 3.G.A.1

    Builds on: Needs Week 33 Day 1 (naming polygons by counting sides). One-minute check: ask the names of polygons with 4 sides and with 6 sides (quadrilateral; hexagon).

    New words:
    • vertex – a corner where two sides meet; more than one are called vertices

    Materials: 24 toothpicks (or straws cut short), 24 small balls of clay or dough (or mini marshmallows), Grid paper, Ruler, Notebook, Pencil

    1. Warm-Up · 5 min

      Spaced review from Week 30 Day 3. A pentagon has sides of 4, 6, 3, 5 and 7 cm. Your child finds the perimeter (25 cm). Then practice ×4 facts with no clock. Ask 4 × 4, 4 × 7 and 4 × 8 (16, 28, 32).

    2. Mini-Lesson · 10–15 min

      Say: "A side is a straight edge of a polygon. A vertex is a corner where two sides meet. More than one are called vertices." Build a square with 4 toothpicks and 4 clay balls. Touch each toothpick. Ask: "How many sides?" (4) Touch each clay ball. Ask: "How many vertices?" (4) Build a pentagon the same way. Count together: 5 toothpicks and 5 clay balls. Ask: "What do you notice?" (The two numbers match.) Say: "So a pentagon has 5 sides and 5 vertices. Every polygon has the same number of sides and vertices." Now pull one toothpick out of the pentagon. Ask: "Is it still a polygon?" (No. It is not closed.) Say: "A polygon must be closed, with every side joined at a vertex." Now your child does more. Your child builds a hexagon and counts both. (6 sides; 6 vertices)

    3. Guided Practice · 10–15 min

      Your child builds or draws each one, then counts sides and vertices. 1) Push the toothpick square sideways so it leans. Is it still a quadrilateral? (Yes. It still has 4 sides and 4 vertices.) 2) Build an octagon. (8 sides; 8 vertices) 3) Draw an L-shape on grid paper with a ruler. Put a dot on each vertex. (6 vertices and 6 sides; a hexagon) 4) Ask: "A polygon has 10 sides. How many vertices does it have?" (10) If stuck, say: "Put a dot on each corner. Touch each side once. Count the dots, then the sides."

    4. Independent Practice · 15–20 min

      Your child makes a table with three columns: name, sides, vertices. 1) Draw a quadrilateral that is not a rectangle. (4; 4) 2) Draw a pentagon. (5; 5) 3) Draw a hexagon with sides of different lengths. (6; 6) 4) Draw an octagon. (8; 8) 5) A polygon has 7 sides. How many vertices does it have? (7) 6) You draw a plus-sign shape on grid paper. Your child dots and counts. (12 vertices; 12 sides) 7) Leo builds one polygon with 6 toothpicks, one for each side. How many clay balls does he need? (6) 8) Ana uses 9 clay balls for the corners of one polygon. How many toothpicks does she need? (9) Check that each row of the table has matching numbers.

    5. Exit Ticket · 5 min

      Read each question aloud; your child answers on paper and may build with toothpicks for question 3.

    Watch for: Thinking a shape must look even to keep its name, so a lopsided hexagon is not called a hexagon.

    Try: Count the sides together. The number of sides, not the look, decides the name.

    Fact fluency: ×4 facts

    Exit ticket:
    1. What is a vertex?
    2. How many sides and how many vertices does a hexagon have?
    3. You pull one toothpick out of a toothpick octagon. Is it still a polygon? Why?
    Show answers
    1. A corner where two sides meet.
    2. 6 sides and 6 vertices
    3. No. It is not closed.

    Support: Start with the 4-toothpick square. Your child puts a dot on each vertex before counting, then touches each side once.

    Extend: Ask: "Can a polygon have only 2 sides?" Your child tries with toothpicks. (No. Two straight sides cannot close a shape. The fewest is 3.)

    Homework: Your child sketches three polygons from around the house and dots each vertex. Under each, your child writes the number of sides and vertices. Sample: a door has 4 sides and 4 vertices.

    Practice page · Week 33, Day 2

    Mathematics

    I can count the sides and vertices of polygons.

    Look: sides and vertices

    1. A side is a straight edge.
    2. A vertex is a corner where two sides meet.
    3. A square has 4 sides and 4 vertices.

    Fill in the table. Draw each shape first.

    ShapeSidesVertices


    1. 1.

      triangle: how many sides and vertices?

    2. 2.

      pentagon: how many sides and vertices?

    3. 3.

      hexagon: how many sides and vertices?

    4. 4.

      octagon: how many sides and vertices?

    Answer each question.

    1. 5.

      Ben builds a closed shape with 7 toothpicks. How many vertices does it have?

    2. 6.

      A shape has a gap in one side. Is it a polygon?

      ○ yes○ no
    3. 7.

      What do you notice about sides and vertices?

    Challenge: Draw a hexagon with sides of different lengths. Is it still a hexagon?

    Materials: toothpicks · clay or play dough

    English Language Arts

    Objective: I can speak loudly, clearly and at a good pace while looking at my audience.

    Standards: SL.3.6, SL.3.4

    Builds on: Needs yesterday's five note cards and reading aloud with expression from earlier fluency work. One-minute check: your child puts the five cards in order and names each part. (Hook, main idea, fact 1, facts 2 and 3, close.)

    New words:
    • eye contact – looking at your listeners while you speak

    Materials: Note cards, Mirror, Clock, A family member as audience, Writer's notebook, Pencil

    1. Warm-Up · 5 min

      Word study (about 3 minutes). Write point, enjoy, cloud, crown and draw. Your child copies each word and circles the two letters that spell the vowel sound. Ask: "Why is it oy in enjoy?" (The sound comes at the end.) "Why is it ow in crown?" (It comes before a last n.) Your child splits en|joy into syllables. Spaced review from Week 2. Ask: "How does your voice change at a question mark?" (It goes up at the end.)

    2. Mini-Lesson · 10–15 min

      Warm up the voice. Say this tongue twister slowly, at talking speed, then too fast: "Six sleek seals sat on slippery rocks." Ask: "Which speed was easiest to understand?" (Talking speed.) Teach four voice tips and write them down. Loud enough for the back of the room. Clear, with the ends of words finished. Steady, with a pause at each period. Expression, with a stronger voice on important words. Then teach eye contact: "Look up at the end of each sentence. Meet one listener's eyes." Read aloud this practice card, "Otter Pups," twice: A newborn sea otter pup floats like a cork. Its baby fur holds so much air that the pup cannot sink. The mother floats on her back and carries the pup on her chest. She grooms its fur and feeds it. When she dives, she may wrap the pup in kelp. By about two months, the pup starts to dive too. The first time, mumble and stare at the page. The second time, use all four tips and look up. Ask: "What changed?" (Louder, clearer, pauses, eyes up.) Say: "When a listener asks something, answer in a complete sentence."

    3. Guided Practice · 10–15 min

      1) Your child reads "Otter Pups" aloud, loud and clear. 2) Your child marks the card. Draw a slash after each period for a pause. Underline one word to stress in each sentence. (Samples: cork, sink, chest, grooms, kelp, dive.) 3) Your child reads it again and looks up at each slash. Give a thumbs up for each tip you notice. 4) Your child says the hook card three ways: quietly, then loud and clear, then with a pause before the surprising part. Ask: "Which way would a listener like best?" (Loud and clear, with the pause.) If stuck, say: "Read one sentence. Stop. Look at me. Breathe. Now read the next one."

    4. Independent Practice · 15–20 min

      Your child practices the full talk three times. 1) In front of the mirror, watching for eyes up. 2) For a family member seated nearby. 3) From the far side of the room, loud enough to reach. After each run, the listener names one strong tip and one tip to work on. Your child writes both in the notebook, along with the clock time. Look for: a pause at each period, eyes up after each sentence, and a time of 3 to 5 minutes.

    5. Exit Ticket · 5 min

      Ask the three questions. For question 2, your child stands and shows you.

    Watch for: Speeding up when nervous, so the words run together.

    Try: Draw a small slash on each card where your child must pause and take a breath.

    Exit ticket:
    1. Which word did you choose to stress on your hook card, and why?
    2. Say your main idea sentence to me. Where do your eyes go when the sentence ends?
    3. What got easier from your first practice run to your third?
    Show answers
    1. Answers vary. Look for: an important or surprising word and a reason.
    2. Up from the card to one listener.
    3. Answers vary. Look for: one clear change, such as a louder voice or fewer looks at the cards.

    Support: Change one thing at a time. Your child practices sitting down first, then standing, then standing far away.

    Extend: Your child underlines two words to stress on every card and adds a slash for one extra pause.

    Homework: Give your talk once tonight for a family member who sits across the room. Ask if they heard every word.

    Practice page · Week 33, Day 2

    English Language Arts

    I can speak loudly, clearly and at a good pace with eye contact.

    Practice Card

    Sea stars have no brain. / They can grow a new arm if one breaks off. / Some sea stars have more than 20 arms! / Next time you visit the shore, look closely in the tide pools.

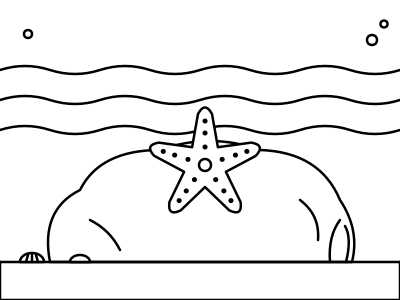
    A five-armed sea star rests on top of a rock in a tide pool.

    Mark the card above for your talk.

    1. 1.

      Underline one word in each line to say with extra expression.

    2. 2.

      Put a star where you will look up at the audience.

    3. 3.

      Name two voice tips.

    4. 4.

      Your listener asks, 'What did you learn?' Do not answer 'Arms.' Answer in a complete sentence.

    Write ou or ow to finish each word.

    1. 5.

      The c__ ate grass.

    2. 6.

      Open your m__th wide.

    3. 7.

      The king's cr__n is gold.

    Challenge: Read the card three times. Record your time. Which tip got better?

    Science

    Objective: I can describe the steps of how most fossils form and make a model of a fossil.

    Standards: 3-LS4-1

    Builds on: Needs Day 1: fossils are remains or traces from long ago. One-minute check: ask, "Is a fossil leaf print remains or a trace?" (Remains. The leaf was part of the plant.)

    New words:
    • sediment – bits of mud, sand and tiny stones that settle in layers
    • minerals – hard natural materials that rocks are made of
    • mold fossil – a hollow print in rock shaped like a living thing

    Materials: Modeling clay or salt dough, a ball the size of an orange (salt dough: 1 cup flour, 1/2 cup salt, about 1/2 cup water), A shell, a leaf with thick veins and a small toy animal, Paper plate, Plain paper and pencil, Science notebook

    1. Day 162 — How Fossils Form — Wonder Warm-Up · 5 min

      Spaced review from Week 10. Ask: "What does a decomposer do?" (It breaks down dead plants and animals.) Then the wonder. Ask: "Most dead things rot away. So how does a bone ever become a fossil?"

    2. Mini-Lesson · 10–15 min

      Say: "Most living things never become fossils. Decomposers and weather break them down. A fossil needs special conditions." Draw four boxes on plain paper and sketch as you speak. Say: "One. A living thing dies and is quickly buried by sediment, which is mud or sand, often under water." Say: "Two. Soft parts rot away. Hard parts like bones, shells and teeth last longer." Say: "Three. More layers pile on top for thousands to millions of years. Their weight presses the lower layers into rock. Water carrying minerals seeps into the hard parts. The minerals slowly fill and replace them, so the bone becomes stone." Say: "Four. Much later, the land may be pushed up. Wind and water wear the rock away. The fossil is uncovered." Say: "Sometimes a shell dissolves and leaves only its shape in the rock. That hollow print is a mold fossil." Ask: "Why does quick burial help?" (It keeps animals, decomposers and weather from breaking the body apart.) Ask: "Which lasts longer after death, a snail's body or its shell?" (Its shell.) Ask: "What turns a buried bone into stone?" (Minerals from water.) If stuck, say: "Point to the box. What happens next to the buried bone?"

    3. Investigation / Hands-On · 15–20 min

      Model Fossil. 1) Flatten the clay on the plate until it is as thick as a finger. This is the sediment. 2) Your child presses the shell firmly into the clay and lifts it straight up. The print is a model of a mold fossil. 3) In a fresh spot they press the leaf, vein side down. 4) In another spot they walk the toy animal's feet across the clay. These prints model a trace. 5) Your child compares the three prints. Table: Object | Models remains or a trace | Details I can see. Change only the object. Keep the clay thickness and the push the same. A hard, ridged shell often leaves the sharpest print. Real results vary. Look for the pattern. 6) Ask: "Which of the four steps does pressing show?" (Burial in sediment.) Ask: "What can the model not show?" (Rotting, minerals, hard rock or millions of years.) Keep the model flat on the plate for Day 3.

    4. Science Notebook Entry · 10 min

      In the notebook, your child draws a four-box comic strip of how a fossil forms. They label the boxes: buried, soft parts rot, minerals turn it to stone, uncovered. Under the strip they finish the frame: "My model shows ___. It cannot show ___." Sample: "My model shows a shell pressed into mud. It cannot show millions of years."

    5. Wrap-Up & Exit Ticket · 5 min

      Ask the three exit questions aloud; your child may point to the comic strip. Praise steps told in the right order.

    Watch for: Thinking fossils form in days or years, the way the clay print does.

    Try: Say: "Our model took one minute. A real fossil takes far longer than all of written history."

    Exit ticket:
    1. Put the four steps in order: uncovered, buried, minerals turn it to stone, soft parts rot.
    2. Which is more likely to become a fossil, a jellyfish or a snail? Explain.
    3. Your clay print took one minute. Name one way a real fossil forms differently.
    Show answers
    1. Buried, soft parts rot, minerals turn it to stone, uncovered.
    2. A snail. Its hard shell can last. A jellyfish is all soft, so it usually rots away quickly.
    3. Any 1: it takes thousands to millions of years, sediment layers bury it, or minerals turn it to stone.

    Support: Act out the four steps with the toy animal and the clay before drawing. Say each step together.

    Extend: Your child explains why a lake animal is more likely to become a fossil than a desert animal. (Lake mud buries it quickly.)

    Homework: Show the model fossil to a family member and explain the four steps. Look for: the steps in order and one thing the model cannot show.

    Practice page · Week 33, Day 2

    Science

    I can describe how most fossils form and make a model fossil.

    From Mud to Rock

    Most fossils start when a plant or animal is buried quickly in mud or sand. Soft parts rot away. Hard parts, like bones and shells, stay. Over a very long time, more mud piles on top. Minerals in water seep in and slowly turn the hard parts to rock. Millions of years later, wind or water may wear the rock away and uncover the fossil.

    Number the steps in order from 1 to 4.

    1. 1.

      Minerals seep in and slowly harden into rock. ____

    2. 2.

      Wind, water or Earth movements uncover it. ____

    3. 3.

      A living thing dies and is buried in mud or sand. ____

    4. 4.

      The soft parts rot away. ____

    Model Fossil. Press a shell or leaf into clay, lift it out and draw the print.

    1. 5.

      Draw your mold fossil.

    2. 6.

      What can your model NOT show about real fossils?

    Challenge: Why do soft body parts, like skin, rarely become fossils?

    Materials: modeling clay or salt dough · a shell, leaf or small toy animal · paper plate

    Standards-matched clips that reinforce today's objectives.

    Mathematics
    4:25

    Polygons - Geometry for Kids

    Smile and Learn

    Supports: Identify sides and vertices of polygons

    3.G.A.1
    Watch on YouTube
    English Language Arts
    7:11

    How to communicate clearly

    TED-Ed

    Supports: I can speak loudly, clearly and at a good pace while looking at my audience.

    SL.3.6
    SL.3.4
    Watch on YouTube